PDCA质量体系:驱动高精度CNC加工的持续改进
我是公司精密项目团队里的工程师之一,在日常工作中,我越来越清楚一点:高精度从来不是靠某一次“英雄式”的完美首件,而是靠一个系统,持续把那些细小变量锁在可控范围内。PDCA(策划 Plan、执行 Do、检查 Check、改进 Act)就是我们用来“把质量设计进去”、在产量上来时仍然守住稳定性,并让下一批零件比上一批更可控、更优的核心框架。

为什么 PDCA 在真实工厂里很重要
公差、稳定性与重复性
零件“超差”往往不是一次性的大事故,而是很多细节在悄悄偏移:刀具刃口磨掉了几个微米,夹具慢慢下沉,切削液浓度在变化,车间环境温度漂移,这些都足以让一个孔的结果发生偏差。PDCA 迫使我在一开始就把 CTQ(关键质量特性)识别出来,然后主动控制那些真正会“推动”它们变化的因素。
对棱柱类零件,我会尽量依托成熟的CNC 铣削能力;涉及旋转特征时,我更信任刚性好的车削工艺;遇到薄壁、尖角或受热影响明显的几何特征,我会把关键尺寸转移到精密的EDM 放电加工工序中。对于跨多道工序的零件,我更倾向于把它规划进一体化的CNC 综合加工流程,避免多家供应商叠加出的尺寸“堆栈误差”。
对齐行业预期与合规要求
航空航天和医疗项目的生命线在于可追溯性、MSA(测量系统分析)纪律以及干净利落的 FAI(首件检验)。PDCA 给了我一条清晰主线:在 Plan 阶段就把这些要求布好局,在 Do 阶段通过试生产把它们验证出来,然后把有效做法固化进标准作业。对于那些认证要求重、验证环节多的项目,我们专门聚焦航空航天和医疗器械的团队,日常就“讲这门语言”。
你能立刻感觉到的收益
当 CTQ 被写进控制计划,并用 SPC(统计过程控制)持续监控时,首件通过会更顺畅,返工率会下降,质量成本的重心会从“救火”转移到“预防”。换句话说,同样的钱,越来越多花在“避免问题”而不是“收拾烂摊子”上。
PLAN —— 我如何搭建一个可靠的质量策划
客户之声与 CTQ 提炼
我会先从图纸和 3D 模型走一遍:零件到底是在哪里密封、定位、承载?真正“干活”的地方就是 CTQ。接着我会把检验条件也确定下来——夹紧方式、环境温度、测量可达性——确保计量条件与实际功能一致。如果这些假设还需要验证,我会先走一轮快速的原型试制流程,顺便测试夹具和测量方案是否可行。
工艺������、控制计划与检验计划
对于每一道工序,我都会记录清楚:使用哪台设备、什么工装夹具、刀具号与补偿、程序版本、切削液要求、检验方式。然后为每个特征设定抽样数量、检验频次以及触发反应的条件。一旦与 CTQ 相关,所用量具都会被安排 MSA/GR&R,这样我们才知道“测出来的数”到底是在反映零件,还是在反映量具本身的波动。
面向制造设计与夹具策略
铣削零件,我更倾向于设计稳定的基准体系,并尽可能减少重复装夹次数;车削件则通常需要软爪方案与现场镗爪,以控制跳动。对于几何比较脆弱或材料耐热性强的零件,我会把高风险尺寸放到线切割或型腔 EDM 中去做。如果一个零件理论上需要四个朝向加工,那么采用一次装夹的多轴加工策略,在能力指数和稳定性上通常都“值回票价”。
风险管理与可追溯性
我会做 PFMEA(过程失效模式与影响分析),尽量把“最丑、最难看”的失效模式在前期挖出来。高 RPN(风险优先数)的项目要么加防错,要么加严检验。可追溯体系则把材料炉号、机台编号、程序版本、操作员标识都与每一批甚至每一个序列号关联起来,这样当问题出现时,我们可以回答“发生了什么变化”,而不是在车间里瞎猜。
材料选择与下游工序
材料特性决定了很多策划内容。需要在刚度和成本之间平衡时,我常常选用6061-T6 铝合金;追求高比强度的结构件,我会优先考虑Ti-6Al-4V(TC4)钛合金;高温区或强腐蚀、强磨蚀环境下,我通常会围绕Inconel 718 高温合金来设计;对耐蚀性要求极高的壳体类产品,则多采用SUS316L 不锈钢。
“计量方案要对得上图纸”
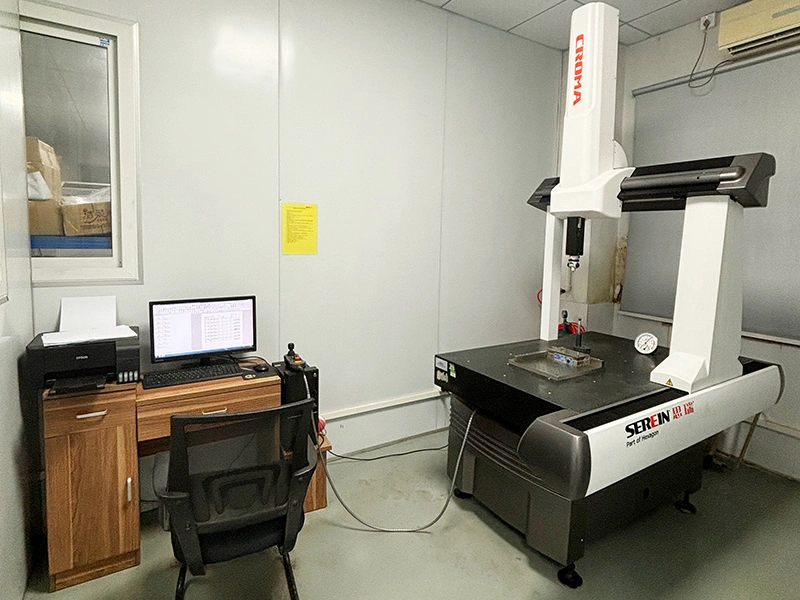
带基准和位置度的形位公差,通常需要接触式 CMM;微小倒角、窄槽更适合用光学系统;表面粗糙度承诺最终要靠轮廓仪或粗糙度仪“说话”;螺纹则交给专用塞规和环规。能力目标(Cp/Cpk)决定抽样强度和检验频率。
DO —— 我如何保持生产过程稳定运行
程序验证与首件确认
在正式切削之前,我会验证后处理与机床运动学,先用安全高度做空跑,再用机内对刀仪 / 探头锁定基准、补偿毛坯余量。首件必须是真实生产条件下的零件,我会把后续做能力评估需要的测量数据全部采集好。
装夹、探测与温度管理
扭矩扳手设定、刀长补偿以及夹紧顺序都保持一致。在线探头程序会在循环中检查夹具位置与关键特征。热机程序和切削液浓度管理,防止机床“膨胀”把零件尺寸一起带偏。对于要求到微米级重复性的项目,我会尽量把相关工序整合到专用的精密加工单元里完成。
首批量产前的能力确认
在真正放量之前,我会先跑一批试生产,对 CTQ 做 Cp/Cpk 能力评估。如果某个特征在能力图上“走神”,我会回头调整刀具与参数、重新评估夹具,或者把该特征转移到更加稳定的 EDM 工序中去完成。
变更控制
每一次变更都通过 ECN(工程变更通知)来管理,工艺流转单、程序版本和检验计划要同步更新。如果变更涉及 CTQ,我们会重新做能力验证,确保“改得更好,而不是改出新的问题”。
特殊工艺的管控
热处理和表面处理是工艺路线的一部分,而不是“最后随便找家厂打一打”的附加项。对于铝合金壳体,我通常会指定阳极氧化来提升耐蚀性;对于承载流体的内部不锈钢通道,电抛光帮助我兑现对表面清洁与粗糙度的承诺,而钝化则进一步稳定铬层,确保长期防护性能。
CHECK —— 我测什么,以及我如何对信号做出反应
过程 / 终检与 GR&R
轻量级的过程检查——在线探测、通止规——保护的是机台节拍;几何精度与复杂轮廓则交给 CMM 做周期性审核。凡是接触 CTQ 的量具,都需要当前有效的 GR&R 结果,确保量具自身的变差不会掩盖零件的真实变差。
“真正在用”的 SPC
我会给 CTQ 建立控制图,并为趋势与失控信号制定清晰的反应规则。如果图线开始“发抖”,我不会等红牌 / 报废再承认有问题——那时往往已经太晚了。
首件与周期审核
FAI 要证明的是“我们能够稳定做出合格品”,而不仅仅是“这一次运气不错”。周期性审核可以阻止那些悄无声息的漂移:重新确认夹具状态、程序版本、量具健康。审核记录会直接喂给下一轮 Act 阶段的改进工作。
不合格与根因分析
一旦出现不合格,我会完整记录:工序、机床、刀具、量具、操作员、时间点和材料批次——足够多的上下文,才能看出模式。5 Why 和鱼骨图是我的常用工具,最后我会用 8D 把问题关上,确保这个解决方案可以“扛得住下一班次”。
ACT —— 让改进“长久有效”的方式
把有效做法标准化
问题一旦解决,我会立刻把新做法写死:更新作业指导书、夹具图、CNC 宏程序、探测逻辑、培训内容以及现场的可视化控制;旧版本则归档,确保不会“悄悄卷土重来”。
防错与自适应控制
Poka-yoke(防错)既可以是物理的(带定位键的夹具),也可以是数字的(当测量结果漂移时自动停机的宏程序)。对于磨耗明显的难加工合金,把在线探测结果与刀补 / 偏置关联,能在不增加人工干预的情况下,让零件尺寸持续保持在公差中间带。
有投资回报的改善
我会维护一个改善清单,用 CTQ 风险和经济影响来排序。最常拿到高分的一类,是通过单次装夹多����������原本需要多次翻面装夹的工序压缩成一套稳定的循环,从而彻底消除中间的装夹堆栈误差。
记录“这次学到了什么”
每一次改进,都会记录清楚:改变了什么、为什么有效、带来了怎样的新能力。下一批同族零件上线时,就可以从“本垒”直接开局在“三垒”,不用从头再犯一次旧错误。
来自我工作台的三个小案例
1)航空支架(6061-T6)
多次装夹让位置度在图纸边缘来回“蹭”。我们改用一次装夹的摆动工作台方案,循环中在线探测基准,配合标准化的偏置宏程序。能力指数回到了中心,并在后续批次里一直稳定在那里。
2)医疗壳体(SUS316L)
内部粗糙度和毛刺要求都很苛刻。我们使用低振刀具和专用螺纹规,确保加工过程干净,再通过 CMM 和粗糙度仪双重确认。标准化的去毛刺流程,加上对关键孔的电抛光,构成了一套完整工艺。现在对类似壳体项目,这一“剧本”可以几乎原样复用。
3)涡轮测试夹具(Inconel 718)
断续切削让被夹持的薄壁产生变形。在 Plan 阶段我们就把热胀问题标了红,随后将该薄壁特征转移到 EDM 精加工,在 Check 阶段通过热稳定后的复测来确认尺寸。最终形成了一套“先粗加工,再稳定再精加工”的标准流程,现在已经成为处理激进镍基几何结构的默认方案。
支撑这一切的基础设施
多轴机床减少了翻面装夹;在线探头帮我们抓住基准和趋势漂移;刀具管理系统尽量消灭“意外失效”;状态监测在主轴或轴向偏离时提前预警。数字化 QMS 把图纸、流转卡、SPC 数据和 NCR(不合格报告)都绑定在同一套“单一事实源”上。对于那种要求进到个位数微米世界的零件,我会用专门为高重复性设计的生产单元来生产它们。
PDCA 如何改变成本与交期曲线
产品的学习曲线会变得更“顺滑”:从原型、到小批量、再到大批量。我们在“预防”上的投入越来越多,而“检验”和“失败”这两块成本会出现更明显的下降。如果你打算放大产能,我会建议先通过小批量制造路径来搭建能力,等能力指数与良率都站稳,再过渡到稳定的大批量生产。
我常用的 30 天 PDCA 入门打法
第 1 周:梳理 CTQ,起草控制计划,选定量具,写好反应计划。在任何“冒切”之前,把验证方案和夹具准备到位。 第 2 周:在接近量产的条件下跑一轮试生产。为所有 CTQ 量具完成 MSA/GR&R。启动 SPC,并给操作员做“如何根据图表行动”的培训。 第 3 周:审核生产单元与流转卡,补齐发现的缺口,优先解决列表中最重要的改善项。如果必要,就把高风险几何转移到 EDM,或通过多轴夹具来压缩装夹次数。 第 4 周:回顾 Cp/Cpk、不合格记录和节拍数据。锁定标准作业,更新知识库,并把这套做法复制到类似的零件族上。