Resin and Plastic 3D Printing Service | Stereolithography (SLA)
Introduction: Why SLA Is the Top Choice for High-Precision Plastic Prototypes?
Stereolithography (SLA) is a strong resin and plastic 3D printing choice when a prototype needs fine external detail, a smooth finish, and controlled visual or fit validation. SLA is especially useful for appearance models, compact housings, transparent review parts, and components whose small features would be obscured by a coarser process. It is not a universal substitute for injection-molded or machined plastic. Photopolymer behavior, support scars, post-cure movement, UV aging, heat, and sustained load can make an SLA sample unsuitable for final-material validation. A useful request therefore defines the resin grade, intended test, critical surfaces, datum scheme, quantity, finish, environmental exposure, and pass/fail measurements before the supplier chooses orientation or supports.
Deep Dive into SLA Technology: How Light Shapes Precision Parts
SLA builds a part by selectively exposing liquid photopolymer resin to light, solidifying one cross-section before recoating and exposing the next. The sliced CAD model controls the nominal layer geometry, while exposure, resin temperature, recoating, part orientation, support stiffness, and separation forces influence the physical result. Layer height or laser spot size describes one process setting, not the tolerance of every completed feature. A thin wall, deep blind hole, broad flat surface, or unsupported edge can respond differently even within one build. Dimensional acceptance must therefore refer to the washed, post-cured, support-removed, and finished part rather than the digital slice or green part.
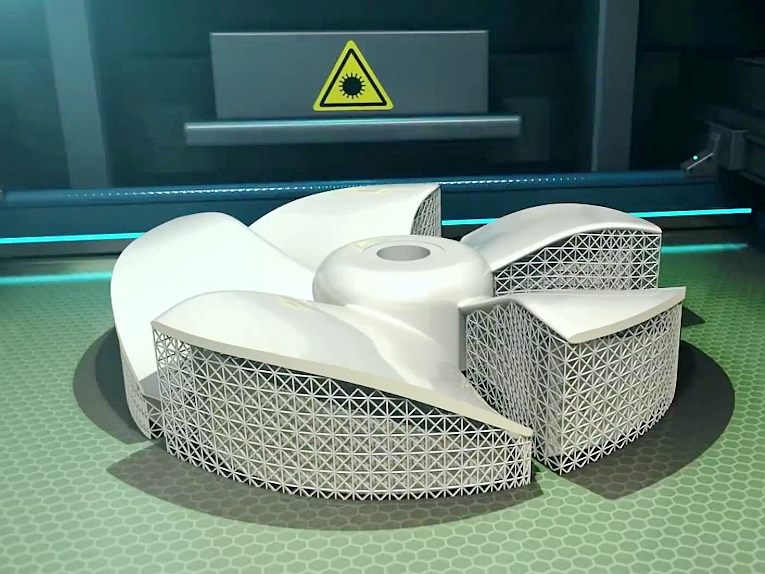
A controlled SLA workflow connects CAD review, orientation, support design, resin preparation, printing, draining, washing, drying, post-curing, support removal, finishing, and final inspection. Each handoff can change the result. Trapped resin can remain in enclosed cavities; over-washing can affect fine features; uneven cure can move thin walls; and aggressive support removal can chip an edge or distort a hole. Critical cosmetic faces should avoid support contacts whenever geometry allows, while load-bearing bosses and long spans need enough support to survive printing and handling. The drawing or RFQ should identify measurement datums, sealing faces, threaded features, clear surfaces, and no-support zones so inspection tests the same requirements that drove the build strategy.
A Comprehensive Resin Portfolio: Matching the Best Performance to Your Application
SLA resin should be selected by the decision the prototype must support, not by a broad label such as standard, tough, clear, or high temperature. A cosmetic model needs color and finishing stability, while a snap trial needs elongation, notch resistance, and controlled cure. A thermal fixture needs stiffness under a defined temperature and load history. Datasheet values are screening evidence, because printed orientation, wall thickness, cure schedule, moisture, chemicals, and test duration can change part behavior. Buyers should state which property decides acceptance and request the supplier's exact resin designation, processing condition, and verification route.
Standard resins suit form studies, dimensional review, painted display models, and early concept validation before CNC Machining Prototyping. Their smooth surfaces and crisp edges can reveal seam placement, interference, and visible design defects without committing to final tooling. The limitation is functional equivalence. A rigid display resin may chip around a screw boss, creep under sustained clamp load, or crack at a thin snap even when the geometry prints cleanly. If the decision concerns production-plastic fatigue, impact, or chemical exposure, use the SLA part for geometry first and move the decisive test to the specified engineering plastic.
Tough or durable photopolymers are better candidates for short assembly trials, clips, covers, and handling tests within a defined Prototyping Service plan. Higher elongation does not make a resin equivalent to molded ABS, polypropylene, polycarbonate, or nylon. Notches, print direction, post-cure, temperature, screw preload, and the number of cycles still govern failure. For a snap-fit trial, record insertion force, retention force, cycle count, crack location, and permanent set. If those results must predict production performance, repeat the test in the intended production grade and process rather than transferring the SLA result directly.
High-temperature resins can support short thermal checks or fixtures only when the datasheet test method, load, cure condition, and exposure duration match the use case. Heat deflection temperature measured under a specified flexural stress is not a continuous service-temperature guarantee. A resin with high heat deflection may still be brittle, creep under preload, or lose performance after repeated thermal cycles. The RFQ should include the temperature profile, dwell time, load direction, fastener torque, chemical contact, and reuse count. When long-term heat, fatigue, or production-material behavior decides acceptance, a machined PEEK, PEI, polycarbonate, or other specified thermoplastic may provide more relevant evidence.
Typical Post-Processing and Finishing Options for SLA 3D Printing
SLA post-processing is part of the manufacturing route, not a cosmetic afterthought. Washing removes uncured resin, post-curing develops the specified material condition, and support removal exposes local scars. Sanding, polishing, primer, paint, or clear coating can then improve appearance, but each operation can change edges, holes, datums, and fit. The finish plan should separate surfaces that may be blended from surfaces that must retain geometry. Buyers should also define whether inspection occurs before finishing, after finishing, or at both stages, because coating build and hand finishing can move an accepted dimension outside its final limit.
Support removal and basic cleaning are required, but their conditions must follow the selected resin and equipment instructions. A washing solvent and time that work for one resin may leave another tacky, swollen, or visually hazy. Blind holes, narrow channels, and downward-facing pockets need drainage and cleaning access; otherwise trapped liquid can leak later or interfere with cure. Support nubs on a sealing land or optical face require more material removal than the same marks on a hidden surface. A first article should be checked for residual resin, blocked passages, chipped edges, local deformation, and dimensions after the full wash and cure cycle.
For appearance or transparent review parts, the CNC Part Polishing Service reference helps frame surface-smoothing questions, but resin finishing needs its own trial route. Progressive wet sanding and polishing can reduce surface scatter, support marks, and shallow layer texture. They cannot remove internal haze, bubbles, resin tint, or cure-related discoloration. A surface may look clear under front lighting yet reveal scratches or distortion when backlit. The buyer should define viewing thickness, lighting, acceptable haze, critical optical area, and whether the part is a display cover, inspection window, fluid model, or measured optical element.
When color, gloss, or texture matters, the CNC Part Painting Solution can guide the discussion about primer, masking, paint build, and inspection. Paint can hide minor layer evidence and support repairs, but it can also fill text, soften corners, tighten bores, and alter snap clearance. Resin must be fully cleaned, dry, cured, and compatible with the coating system before finishing begins. The RFQ should mark no-paint datums, sealing faces, bond areas, thread locations, and mating features. Final color, gloss, adhesion, and dimensions should be approved on a representative coupon or first article under agreed lighting.
A clear protective layer such as the process described for UV Coating for CNC plastic components may improve gloss, handling resistance, or short-term appearance when the coating is compatible with the cured resin. It does not make the underlying photopolymer permanently resistant to yellowing or mechanical aging. Coating thickness can affect slots, bores, clips, and optical refraction, while poor surface preparation can cause fisheyes, delamination, or uneven gloss. Specify coated and masked regions, target appearance, environmental exposure, adhesion check, and post-coating dimensions instead of treating clear coat as an unconditional durability upgrade.
Key Advantages and Application Scenarios of SLA Technology
SLA adds the most value when a physical part must answer a detailed visual, ergonomic, packaging, or assembly question before tooling or production machining. Smooth surfaces, fine lettering, compact clips, cosmetic curves, and transparent shapes are accessible when orientation and finishing are planned around the acceptance criteria. SLA provides less relevant evidence when the decision depends on years of UV exposure, continuous high temperature, production-plastic fatigue, aggressive chemicals, or certified patient contact. In those cases, the SLA model can still confirm geometry, but the material decision needs coupons or parts made from the specified production grade and process.
Engineering teams should separate geometry validation from material validation and document which one each prototype is intended to answer. A connector that fits an SLA housing confirms access and clearance, but not long-term boss strength. A gasket that sits correctly confirms groove geometry, but not pressure sealing after resin aging. A clear cover can confirm viewing angle, yet not lens power or outdoor color stability. Inspection should follow the intended decision: use dimensional measurement for mating features, controlled lighting for appearance, leak testing for a fluid path, and a defined load or cycle sequence for a functional feature.
Consider a compact pump-controller enclosure with a curved face, connector cutouts, a gasket groove, two screw bosses, and a painted status panel. SLA can provide an early part for hand feel, cable access, seam review, and gasket placement before Rapid Molding or production machining. Support contacts near the groove could compromise sealing, while primer could reduce connector clearance and screw preload could split a brittle boss. The buyer can approve geometry after CMM or gauge checks, approve appearance after the specified paint route, and reserve pressure, impact, and life tests for the intended production material.
Comparison: SLA vs. Other Plastic 3D Printing Technologies (FDM, SLS)
SLA is usually preferred to fused deposition modeling (FDM) when exterior detail, smooth cosmetic surfaces, small text, or transparent finishing matters more than large size or production-thermoplastic behavior. SLA systems may offer layer settings in ranges such as 25-100 µm for particular equipment and resins, but layer height does not guarantee the smallest finished feature or dimensional tolerance. FDM can be more practical for large form checks, quick fixtures, or prototypes that benefit from available thermoplastic grades. Its nozzle path, layer bonding, and support removal can leave more visible texture and direction-dependent behavior.
Selective laser sintering (SLS) is often the better route for self-supporting complex geometry, nested parts, internal passages with removable powder, and functional nylon prototypes. SLA generally provides smoother as-printed exterior surfaces and is easier to finish for high-gloss or transparent appearance, but it requires planned supports. Those supports create contact marks and can restrict internal geometry. SLS powder eliminates attached supports, yet trapped powder and rougher surfaces create different limits for sealed channels, cosmetic faces, and small holes. Buyers should compare the exact material, feature access, cleaning route, surface target, and acceptance method instead of ranking SLA or SLS by one accuracy claim.
The practical process choice follows the risk that decides release. Choose SLA for appearance models, fine exterior features, transparent review parts, paint-ready surfaces, and compact fit checks. Choose SLS when support-free complexity and functional nylon behavior are more important than a polished surface. Choose FDM when build size, budget, rapid form checks, or a specific extrusion thermoplastic matters more than small-detail finish. If no process satisfies every requirement, split the validation plan: use SLA for appearance, another additive process for functional geometry, and machined or molded material for the final mechanical or environmental proof.
Industry Use Cases of SLA 3D Printing Services
In Consumer Products, SLA is useful for cosmetic housings, wearable shells, transparent indicators, buttons, packaging-fit samples, and models that will be painted or photographed. The prototype can answer questions about grip, seam position, logo legibility, connector access, and perceived quality before tooling. The buyer should identify handling level, assembly method, brand color, surface class, and viewing light. If a sample will undergo drop, detergent, sunscreen, or repeated snap testing, the test plan must distinguish an early geometry screen from evidence about the final molded polymer.
Medical device development can use SLA for enclosure mockups, ergonomic handles, fixture concepts, transparent flow visualization, and non-patient-contact design review. In the Medical Device field, intended use controls the requirements. A visual model is not automatically suitable for patient contact, sterilization, surgical use, or regulatory verification. The RFQ should state whether the part is for form review, assembly, clinician feedback, bench testing, or a regulated function. Material documentation, cleaning, traceability, biocompatibility, sterilization, and acceptance evidence must match that declared use rather than the appearance of the printed part.
The automotive industry uses SLA for trim studies, lighting mockups, switch housings, sensor covers, packaging checks, and small under-hood geometry reviews. In Automotive development, a painted interior sample can support color and gap review, while a transparent lamp model can support packaging and light-path discussion. Neither result proves long-term resistance to cabin heat, fuel, oil, UV, vibration, or impact. Buyers should define the exposure profile and use SLA for the decisions it can answer, then transfer environmental and structural validation to the correct production material and process.
Why Choose Neway for SLA 3D Printing Services?
Choose Neway for an SLA project when the proposed manufacturing plan connects the resin print to the exact validation decision, finishing route, inspection method, and next production step. A useful proposal should name the resin, build orientation, support-sensitive faces, post-cure condition, finish, dimensional checkpoints, and any requirement that SLA cannot represent. That transparency is more valuable than an unsupported precision label. Before release, ask for the assumptions behind the quote and confirm which dimensions, surfaces, and functional tests will be accepted on the completed part.
SLA finishing also needs process-specific judgment rather than a generic promise of smooth parts. The CNC Part Tumbling and Deburring reference can help frame broader edge-finishing questions, but tumbling is not automatically appropriate for fragile resin walls, sharp cosmetic features, or tight datums. Hand finishing, media treatment, polishing, or localized repair should be selected by resin, geometry, and surface class. The supplier plan should identify finish allowances, protected features, inspection stages, and the first-article evidence needed before repeating the route.
An integrated route matters when the first SLA prototype answers the geometry question but exposes a material or tolerance limit. The project can then move selected features to Precision Machining Service or compare another 3D Printing process without restarting the design review. A sound handoff carries forward revised CAD, datum definitions, failure observations, finish requirements, and acceptance data. Buyers should prefer a staged route that states why the process changes, which risk the next build addresses, and what evidence is required before tooling or low-volume production.
Get an Instant Quote for Your SLA Project
A quote-ready SLA RFQ includes the native CAD or STEP model, a dimensioned drawing, quantity, exact resin requirement or property target, color, surface class, critical dimensions, datums, and intended use. Add support-free cosmetic faces, transparent areas, coating or masking zones, thread and insert locations, bonding surfaces, environmental exposure, load history, and required inspection records. ISO/ASTM 52901:2017 is a useful purchasing framework because it addresses part definition data, feedstock requirements, final characteristics, inspection, and acceptance for purchased additive parts. It does not replace project-specific tolerances, material specifications, or validation methods, so those requirements must still be stated in the order.
The RFQ should also state the decision each build must support: appearance approval, assembly clearance, ergonomic review, transparent viewing, fixture fit, short functional screening, or transfer to another process. Mark pass/fail features directly on the drawing and define whether measurements apply after cure, after support removal, or after final coating. When risk is high, request a staged plan with a representative feature coupon or first article before the full quantity. That sequence lets the buyer confirm resin condition, support strategy, finish, dimensions, and test method while changes remain affordable, then release the remaining parts or move critical validation to machined or molded material.
FAQs
Will SLA resin parts yellow or lose performance over long-term use?
What minimum feature size and maximum build volume does SLA offer?
How to achieve high transparency with clear resin and what post-processing is needed?
Which resins suit functional tests needing high heat resistance and strength?
Can SLA prototypes be tapped, bonded, painted, or post-processed further?