3D Scanning Measurement for High-Precision CNC Machined Parts

How 3D Scanning Supports CNC Part Quality Inspection
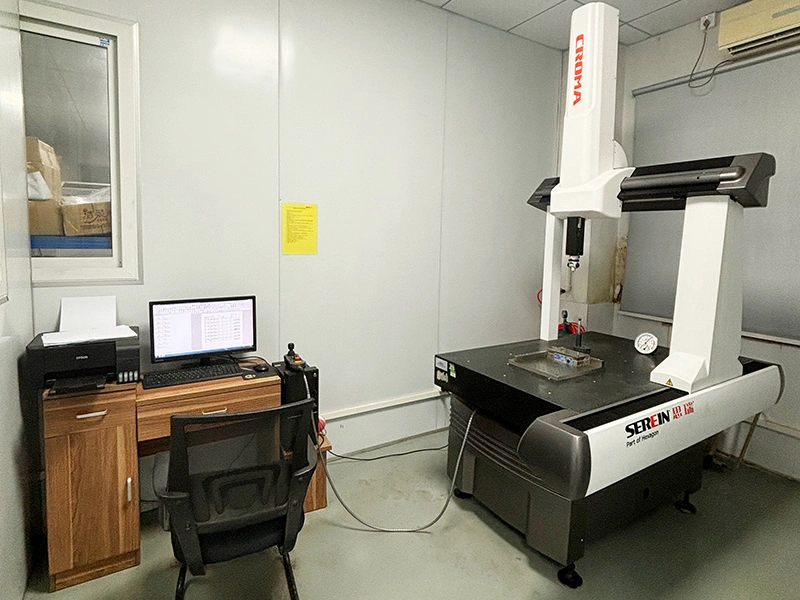
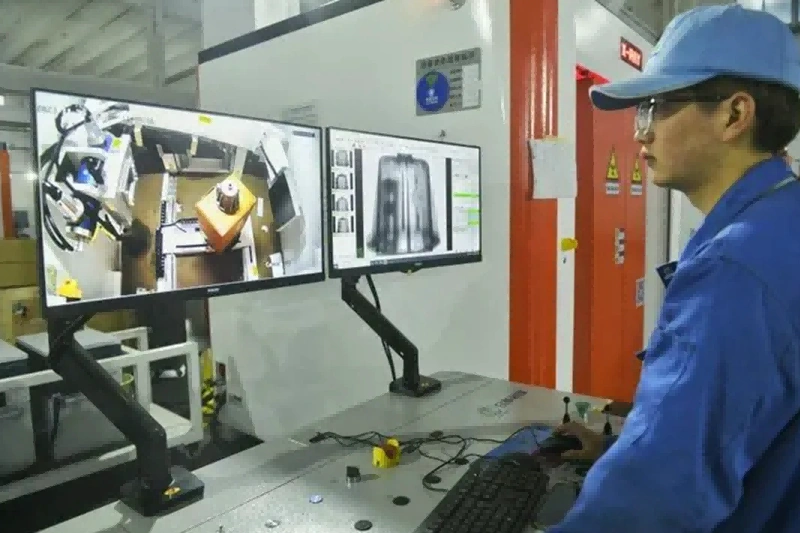
3D scanning helps evaluate high-precision CNC machined parts by capturing dense surface geometry and comparing the measured shape with CAD, drawing, or inspection requirements. It is strongest for profile, freeform surface, casting, forging, molded surface, and assembly-fit questions where single-point checks may miss local deviation. It does not replace every CMM, gauge, or datum-based inspection method. Buyers should decide whether the scan is needed for first article review, process troubleshooting, reverse engineering, or final acceptance before ordering the report. That decision changes the alignment method, report scale, inspection depth, and whether the scan is evidence for correction or only evidence for discussion.
For precision machining, the practical value of 3D scanning is not only speed. The value is seeing how the entire surface behaves after machining, unclamping, heat treatment, polishing, coating, or assembly. A point cloud can reveal bowed thin walls, profile drift near tool-entry regions, sanding marks that changed a curved surface, or mismatch between two mating components. The buyer still needs a drawing or CAD model that defines datums, tolerance zones, critical surfaces, and acceptance rules. Without that basis, a color map is only a shape comparison, not a controlled quality decision. A good inspection request names the functional surfaces first, then asks the supplier to explain what the scan can prove and what still needs contact measurement. This keeps the report useful for both engineering review and purchasing approval.
Laser and Structured Light 3D Scanning Explained
Laser Scanning: Point Cloud Capture for Sharp and Difficult Features
Laser 3D scanning uses triangulation: a laser line or point is projected onto the part surface, and cameras calculate 3D coordinates from the reflected light position. The method can work well on edges, small radii, ribs, pockets, turbine profiles, cast surfaces, and local features that need dense surface data. Scanner accuracy can reach micrometer-level ranges under controlled calibration, part size, surface, temperature, and setup conditions, but that number is not the same as finished part tolerance. For CNC inspection, the report should state the scanner, calibration basis, alignment method, point spacing, surface condition, and which drawing features still require CMM or gauge confirmation. For very tight bores, threads, sealing diameters, and coaxial features, scanning often supports surface diagnosis while plug gauges, thread gauges, air gauges, or CMM programs control acceptance.
Structured Light Scanning: Fast Full-Field Surface Measurement
Structured light scanning projects coded fringe patterns onto the part and reconstructs shape from the pattern deformation captured by cameras. This method is useful when a buyer needs fast full-field data on broad surfaces, ergonomic shapes, molded surfaces, stamped features, or parts that could be distorted by contact probing. For multi-axis machining, structured light can show whether blended faces, freeform surfaces, and sculpted transitions match the intended CAD profile. Reflective aluminum, dark polymer, transparent coating, deep pockets, and steep shadowed areas can still reduce data quality. These surfaces may need surface preparation, changed exposure settings, extra scan angles, or a different inspection method. Buyers should ask whether scanning spray or matte coating is allowed on the part. That choice matters when the component is already finished, cleaned, assembled, or intended for sensitive use.
Choosing a Scanning Method by Geometry, Surface, and Tolerance
The right scanning method depends on geometry, material reflectivity, surface finish, feature accessibility, tolerance level, and reporting purpose. Laser scanning is often better for local detail, edges, and features with optical shadowing. Structured light is often faster for full-field comparison on larger visible surfaces. CT scanning may be needed when internal passages or hidden features control function, while CMM remains important for tight datum-based dimensions and GD&T evaluation. If a report references VDI/VDE 2634 or ISO 10360-style acceptance checks, use the standard reference to understand measuring-system verification, not as an automatic guarantee that every CNC tolerance is achieved. A useful supplier review asks for the uncertainty basis, not only the scanner model. Part size, temperature drift, coating, fixture stability, and alignment strategy can dominate the final measurement risk.
Four CNC Manufacturing Decisions 3D Scanning Can Support
First Article Inspection and Process Adjustment
For first article inspection, 3D scanning can compare the machined surface against CAD and show where the part is oversize, undersize, twisted, bowed, or shifted. This is helpful during the prototyping stage because the color map can guide fixture changes, toolpath compensation, rest machining, roughing allowance, or finishing strategy. A buyer should not approve production from a scan image alone. The useful approval package identifies critical dimensions, datum alignment method, color-map scale, out-of-tolerance areas, likely process cause, and the corrective action for the next build. If the first article shows a repeatable profile bias, the next action may be CAM compensation. If the error changes between parts, fixture stability or material movement deserves priority.
Profile Evaluation for Complex Surfaces and Freeform Shapes
Impellers, turbine blades, medical trial components, housings, molds, and ergonomic parts often need profile control across surfaces that are hard to check with a few probe points. 3D scanning captures dense surface data and helps judge whether the manufactured form follows the CAD intent. In aerospace components, profile error can affect airflow, sealing, balance, or assembly clearance. The inspection plan should define which surfaces are functional and which are cosmetic. It should also state whether best-fit alignment is allowed or whether a fixed datum reference frame controls acceptance. This distinction can change a part from acceptable to rejected, even when the color map looks similar at first glance.
Failure Analysis and Assembly Issue Diagnosis
When a CNC part does not assemble correctly, 3D scanning can compare the suspect part, mating part, and design model to locate interference or clearance loss. The common causes include datum shift after roughing, flange distortion after unclamping, coating buildup near bores, burrs at slot edges, or heat-related movement after machining. A scan helps separate design interference from machining deviation. The buyer should provide mating-part files, assembly orientation, required clearance, fastener preload condition, and which surface is allowed to be reworked. If the failure appears only after tightening or thermal cycling, static scan data should be paired with assembly conditions before the root cause is accepted.
Reverse Engineering When CAD Is Missing or Unreliable
For legacy components, spare parts, worn samples, and design-upgrade projects, 3D scanning provides the measured geometry needed for reverse engineering. The scan should not be treated as a final machinable model by default. Point clouds and STL meshes must be interpreted, cleaned, and rebuilt into CAD when the part needs holes, threads, datum features, controlled mating faces, or future revisions. The buyer should state whether the goal is exact duplication, functional replacement, damage repair, or redesign. That choice determines whether worn surfaces are preserved, smoothed, offset, or rebuilt to nominal geometry. A reverse-engineering RFQ should include photographs, part function, mating parts, allowable design changes, target material, finish condition, and any known failure history. These inputs prevent the CAD model from copying damage that should be corrected.
3D Scanning Workflow: From Data Capture to Inspection Insight
Step One: Define the Inspection Question Before Scanning
Before measurement, the supplier and buyer should agree on the inspection question, critical features, tolerance requirements, and reporting format. Geometry, material, size, surface finish, and accessibility decide the scanning strategy. Reflective aluminum alloy parts may need temporary matte coating when optical glare blocks reliable data. Dark PEEK components may need adjusted exposure, controlled lighting, or extra scan passes. Any coating, fixture, marker, or spray used during inspection should be recorded because it can influence the measurement result.
Step Two: Capture Visible Surfaces and Control Alignment
Multi-angle data acquisition is needed because optical scanners only capture surfaces visible to the sensor. The operator should plan scan positions around pockets, ribs, flange edges, curved surfaces, and regions hidden by fixturing. Targets, part datums, best-fit alignment, or fixture references can be used to register separate scans, but each choice changes the meaning of the result. Best-fit alignment is useful for overall shape comparison. Datum alignment is usually better when the buyer needs drawing-based acceptance, positional tolerance, or assembly-fit evidence. The report should state whether excluded holes, threaded areas, and line-of-sight shadows were ignored, filled by software, or checked by another method. This is especially important for housings and brackets with partially hidden features.
Step Three: Clean Point Clouds Without Hiding Real Defects
After capture, the point cloud may need noise reduction, trimming, registration review, hole filling, mesh creation, and reconstruction. These steps should improve data usability without deleting real machining evidence. Burrs, dents, tool marks, edge breakout, missing surfaces, and reflective artifacts must be separated from true geometry. For reverse engineering, the processed mesh can support CAD reconstruction. For inspection, the processed data should remain traceable to the actual measured surface so the deviation result is not accidentally smoothed into compliance. Buyers can ask for raw scan retention, processed mesh output, and screenshots of excluded regions when the inspection will support a supplier claim or design change.
Step Four: Compare Data With the Correct Alignment and Tolerance Basis
CAD comparison should start by defining the control model, coordinate system, datum scheme, and color-map scale. Best-fit alignment can make an overall surface look acceptable while hiding a functional datum shift. Datum-based alignment can show why a hole pattern or sealing face fails assembly even when the overall shape looks close. GD&T analysis should be tied to the drawing requirement, such as profile, position, flatness, or runout, and not only to a visual color scale. AS9102 first article reporting may be relevant when the buyer needs aerospace-style characteristic accountability, but the drawing still controls which characteristics are accepted. The report should separate measured deviation from engineering judgment. Measured deviation says where the part differs from nominal. Engineering judgment explains whether the deviation affects fit, airflow, sealing, appearance, machining stock, or future process control.
How Buyers Should Read 3D Scan Reports and Deviation Maps
A 3D scan report is useful only when the alignment method, tolerance scale, surface condition, and acceptance rule are clear. Green areas on a color map usually indicate points close to nominal geometry, while warm and cool colors show positive or negative deviation. The exact color meaning depends on the tolerance band selected in the software. Buyers should check whether the report uses best-fit, datum alignment, local alignment, or assembly alignment. A small color deviation on a nonfunctional cosmetic surface may be acceptable, while a similar deviation on a sealing face, bore axis, or datum feature can reject the part. The report should also name excluded regions, filtered artifacts, scan holes, and surfaces hidden from the sensor. These notes prevent a smooth report from hiding missing evidence.
In the medical device sector, functional surfaces must be separated from surfaces that are only ergonomic or cosmetic. A titanium alloy implant trial, instrument, or housing may require surface profile checks, burr control, cleanliness review, and datum-based verification depending on the device class and drawing. 3D scanning can help visualize form error, but regulatory acceptance and critical dimensions may still need validated inspection methods. The RFQ should identify patient-contact surfaces, mating interfaces, surface finish, drawing revision, and required report format. If scanning is used during development, the buyer should separate design-learning reports from final quality records. Mixing the two can create acceptance confusion.
For complex housings in the automotive industry, 3D scan data can help evaluate flange distortion, internal passage continuity, mounting-face flatness, and clearance around rotating or sealing components. A scan can reveal whether the issue is part shape, machining datum error, burr growth, or post-machining deformation. The buyer should provide the assembly stack, gasket or seal condition, torque requirement, and target clearance. These inputs allow the report to connect measured deviation with assembly risk rather than only presenting a colorful surface map.
Engineering Scenarios Where 3D Scanning Changes the Decision
Scenario 1: Blade Profile Accuracy and Tool Wear Review
For an Inconel 718 blade or vane made from Inconel 718, 3D scanning can show whether airfoil profile deviation is local, systematic, or linked to a machining stage. If the scan shows progressive error near the trailing edge, possible causes include tool wear, cutter deflection, stock allowance, fixture movement, or thermal growth. The buyer should ask for a report that separates leading edge, trailing edge, root, platform, and datum regions. CMM checks may still be needed for datums, locating features, and critical dimensions that control assembly. The practical decision is whether to change cutter life limits, finishing allowance, toolpath compensation, or inspection frequency before more high-value material is cut.
Scenario 2: Turbine Housing Interference and Flange Distortion
For a stainless steel turbine housings assembly, 3D scanning can compare the housing, mating component, and CAD envelope to locate interference. A color map may reveal flange bow, bolt-hole position drift, wall-thickness variation, or local high spots left by multi-axis machining. The next decision is not simply pass or fail. The buyer needs to decide whether to adjust fixturing, change finishing allowance, rework the sealing face, revise datum control, or confirm the mating component before cutting another batch. If the scan is aligned by best-fit only, the flange may look better than it performs in the real bolted condition.
Scenario 3: Medical Surface Conformity and Wear Risk
During a prototype medical component review, 3D scanning can compare curved bearing, guide, or instrument surfaces against the intended CAD profile. Local high spots may create contact pressure, abnormal wear, or assembly drag. Local low areas may reduce support or change fluid clearance. The report should state whether the scan is for design iteration, machining correction, or formal acceptance. The buyer should also confirm which surfaces require polished, blasted, anodized, passivated, or machined-only condition before measurement.
How to Use 3D Scanning in a CNC Supplier Workflow
A strong supplier workflow connects 3D scanning with drawing review, process planning, machining strategy, finishing, and inspection. The scan should answer a defined manufacturing question rather than sit apart as a separate report. For example, a profile deviation near a thin wall may lead to changed roughing allowance, stress-relief review, softer fixturing, or a different datum sequence. A flange flatness issue may lead to fixture support changes, final skim cutting, or inspection after coating. The best report connects deviation to probable cause and next action. Buyers should ask whether scan results feed back into tool life, stock allowance, workholding, setup order, and finishing sequence. This turns inspection into process control instead of a late-stage sorting step.
For low-volume production, 3D scanning can support first article learning, pre-production approval, and controlled iteration before cost rises. For mass production, the method can support sampling plans and trend review when the same alignment, surface condition, and reporting thresholds are used consistently. A one-stop service route is valuable only when machining, finishing, inspection, and engineering feedback share the same control model. Buyers should ask who owns the CAD revision, drawing acceptance, and corrective action record. They should also confirm whether the inspection plan changes between prototype, pilot run, and production release. Consistency is what makes scan trends meaningful.
Surface treatments can change both the part and the measurement. sandblasting can alter roughness, soften edges, and change optical reflection. anodized coatings can add thickness and affect bores, threads, grooves, and mating faces. The RFQ should state whether inspection happens before or after finishing, whether coating thickness is included in the tolerance, and which areas must remain masked. This prevents a scan report from approving the wrong manufacturing state. For high-risk parts, ask for the inspection sequence in writing before purchase approval.
Frequently Asked Questions (FAQ)
What is the maximum achievable accuracy of 3D scanning measurements?
Are there specific surfaces, such as dark or reflective surfaces, that can be scanned?
Is 3D scanning suitable for parts with complex internal structures?
How long does it typically take from scanning to receiving the inspection report?
Can 3D scan data be used directly to generate CNC machining programs?